
This girl.

I'd do anything for this girl.
She's the sweetest.
This fall, I had an idea and embarked on a project.
All for her. Because I love her. And she's the best little niece in the world.
It required a lot of help. Thanks Mom and Dad...and my friend Kyle...and our family friend Doug...and my mom's carpenter guy.
Told you it required a lot of help! You didn't believe me, did you?
But I finished this big project just in time for Christmas.

I put the final touches on it on Christmas Eve. Just in time for her to open it up and say, "I make pancakes!?"And to watch her and my Dad play kitchen for over and hour the next day.


To fully understand how awesome that was you need to know my father. He's a busy guy. And the best Grandpa, ever, by the way.
Building this kitchen took a lot of trial and error, and I'll admit a lot of luck too.
I started with this nightstand I found at The Habitat Re-Store. A hotel around here had just gotten all new furniture, so they donated about 25 of these to the Habitat Re-Store. Let's just say I was able to negotiate my way to a good deal on it ;)

Then I cut ply-board to size for the oven door and the backboard and routed them to match the routing on the nightstand. I also found a metal bowl to use for the sink and cut a hole in the top of the nightstand to size.

I sanded everything first with a 100 grit sandpaper to rough it up and then used KILZ spray primer to prime everything before painting. The nightstand had some hardwood on it, but most of it was that plastic pressed board which paint won't stick to. I've found that KILZ will stick to anything, even cheaply built furniture! So go on and buy yourself some of this goodness for your next furniture makeover. You'll thank me later!


I wanted to do glass tile because I knew it would look great, and I've been wanting to learn how to do it, so what a better time to learn than when you only have to do 2 square feet!

I was pretty glad once I started that I wasn't doing any more than 2 square feet! It was a little harder than the pro's on HGTV allude to. After a couple hours I came to realize from this small glass tile project that glass tiling should not be attempted by someone who doesn't know what they are doing. You will end up arguing with your Mother (sorry, Mom!) and getting very frustrated. So, if you learn nothing else from this post, learn that you shouldn't attempt doing a big glass tile project without the help of someone smarter than you. If you fail to take my advice on this subject matter your project will most likely not end well. This is your fair warning!

But, isn't it purdy?!
Next I started painting.
Lord willing, Miss Mollie will have brothers or sisters someday. So, I wanted it to be gender neutral but still be a fun color at the same time. I went with a lime green. Because its fancy. And you know how much I love fancy.

I also wanted to add a chalkboard to the side of the kitchen where she could write daily menu's if she wanted to play "restaurant." I may have had a lot of experience in that department growing up and I was definitely channeling my inner child with that creation! I then used a thin floor board to frame out the chalkboard to make it look finished.

Once I got to this point something ridiculous happened.
My Mom (aka, best Grandma ever) couldn't stop buying kitchen utensils and appliances for her favorite little munchkin.
And just like that we had ran out of counter space. Every woman's dilemma.
So we had to add on....
Here's were I smiled really big and was super happy about said expansion.
Just kidding.
I got mad and threw a fit like a small child.
Just kidding!!!!
We called my Mom's carpenter to ask for help.
I'm NOT kidding!
It was her fault we ran out of space anyways!
We ended up adding three shelves on the side of the nightstand, which in the end, was a double bonus. It provided extra counter space and lots of storage. Win, win!

Then I painted and primed the addition to match the original kitchen.
It was looking pretty good, but I felt like it still needed a little something above the shelves to make it look like not such an addition.
So I called my friend Kyle, who is a welder, to help me come up with some kind of pot rack to hold all of Mollie's pots and pans and kitchen utensils.
We spent an entire Sunday afternoon in his shop and came up with this...

Purdy, huh!? It ended up providing lots of extra storage for everything, too!
Then I gave him a fancy bow on his head with shrink wrap I found in the trash.

This picture is blurry because I remember feeling that I needed to run immediately after I took the picture. Because he really really liked me at this moment. Can't you tell?
Kyle also helped me make the burners. He has this lazer cutter and he cut these bad boys out for me.
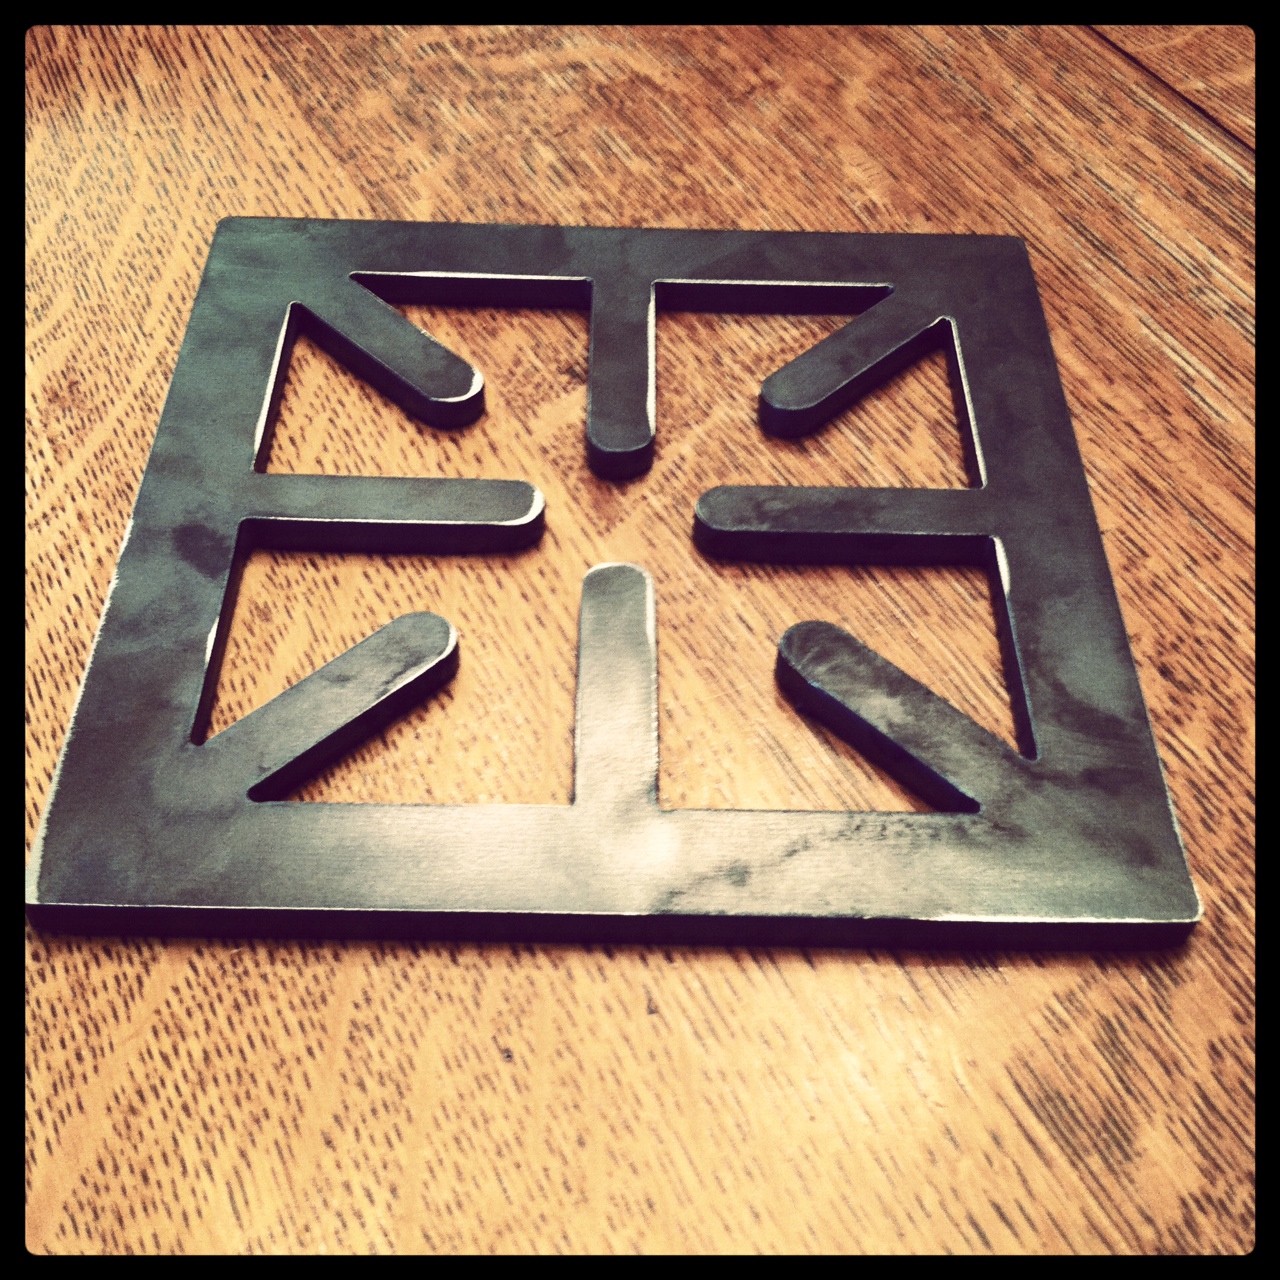
I just had to paint them and then attach them to the nightstand.
I also wanted to come up with a shelf in the oven to mimic a real oven and so I had him weld two cooling racks together to make the oven shelf.

He also made these oven and stove dials that I had found at the Habitat Re-Store work so Mollie can turn her oven and burners on and off!

He's the best. It's so awesome having super handy friends.
I now owe him 19 cakes.
I made the mistake of making him this cake for his birthday.

Now he wants 19 more.
I made the mistake of making him this cake for his birthday.

Now he wants 19 more.
So let me rephrase that...
I love having handy friends that like being repaid in baked goods! :)
At this point I was pretty much on the home stretch. I had bought a lot of the accessories for the kitchen as I went, and I won't go into detail about all of them, because I'm not going to kid myself thinking that this will someday end up on Pinterest :) So just call me if you want to know details!

I kept looking at the shelf thinking that it looked bare and needed some love.
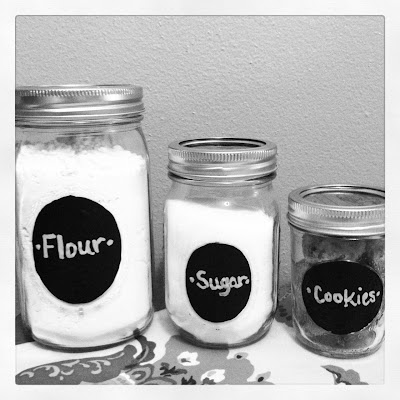
Then I walked in my Mom's kitchen and saw a Mason jar.
It hit me! Every kitchen needs a flour, sugar and cookie jar! So, I rounded up 3 different sizes of Mason jars and put chalk board paint on them. Then I labeled them with a chalk marker, filled them, and fell in love with them! (I did kid-proof the flour and sugar jar by super gluing them down so Miss Mollie wouldn't get a little curious and go cray cray with the white stuff in her house. I'm quite sure her Mother and Father would like me much if that were to happen!!

And because Mollie loves her Grandpa's moo's so much I framed a picture of a calf for her, too :)

The shelf was complete.
The kitchen was complete!!!!!!!!!!!!!!!!!!!!!!!!!!
I then drank a bottle of wine.
Just kidding.
I did have a celebratory glass tho! :)


It turned out SO much better than I ever could have hoped!
And seeing her love it this much made it even more worth it!


I can't wait to deliver it to her in a week and help her make some more pancakes!


A short, brunette is super excited for her kitchen to arrive!!! Can't wait til next weekend! That kitchen is AMAZING!
ReplyDeleteSo, I pinned this on Pinterest. Let's just watch it go crazy!
ReplyDeleteLove you Michelle :-)